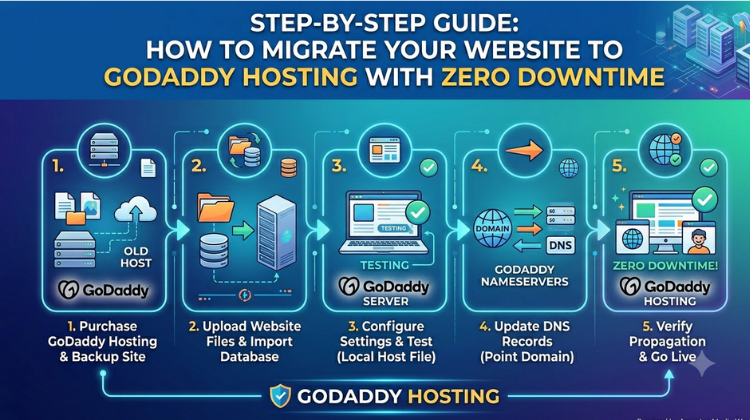
Step-by-Step Guide: How to Migrate Your Website to GoDaddy Hosting with Zero Downtime
Switching your web host can feel like a high-stakes operation. The biggest fear for any business owner is losing valuable traffic, leads, or sales during the transition. Fortunately, moving your digital home doesn’t have to result in costly service interruptions. By following a structured approach, you can easily shift your digital assets to GoDaddy hosting without losing a single second of online visibility.
In this comprehensive tutorial, we will walk you through a foolproof roadmap to successfully execute a migration to your new GoDaddy hosting setup with absolute zero downtime.
Why Choose GoDaddy Hosting for Your Business Website?
Before diving into the migration steps, it is essential to understand why millions of businesses trust GoDaddy hosting to power their online platforms. From robust uptime guarantees and intuitive control panels to scalable infrastructure, GoDaddy hosting provides an ideal balance of performance and affordability for growing companies.
However, maximizing the benefits of your new GoDaddy hosting plans begins with a clean, error-free setup. Let’s look at how you can make the transition perfectly seamless.
Step 1: Secure Your New GoDaddy Hosting Environment
The absolute golden rule of zero-downtime website migration is simple: Do not cancel your old hosting plan yet. First, purchase your preferred GoDaddy hosting package. Once your account is active, set up your new control panel (such as cPanel or Plesk) but do not change your domain name server (DNS) records just yet. Keeping your old hosting active ensures your visitors can still access your live site while you prepare the backup on your new GoDaddy hosting account.
Step 2: Backup and Download Your Current Website Files
To replicate your site accurately on GoDaddy hosting, you need a complete snapshot of your current data.
Log into your current host’s file manager or use an FTP client (like FileZilla) to download your public files.
Navigate to your database management area (usually phpMyAdmin) and export your website’s SQL database.
Having a clean copy of these files ensures that when you upload them to your GoDaddy hosting dashboard, your site’s functionality remains completely intact.
Step 3: Upload Data to Your New GoDaddy Hosting Account
Now that you have your website assets secure on your local computer, it is time to import them into your GoDaddy hosting space.
Log into your GoDaddy hosting cPanel.
Use the File Manager to upload your compressed website files into the public_html directory.
Create a brand-new MySQL database within your GoDaddy hosting account, and import the SQL database file you downloaded earlier.
Update your website’s configuration files (like wp-config.php for WordPress) to reflect the new database name, username, and password provided by GoDaddy hosting.
Step 4: Preview and Test Your Site on GoDaddy Hosting
How do you test your site if the domain is still pointing to your old host? You use a local host file modification or a temporary preview URL provided within your GoDaddy hosting dashboard.
By editing your computer’s local hosts file, you can trick your personal browser into loading the version of your website residing on the GoDaddy hosting servers. Check your links, images, and forms thoroughly to verify everything works flawlessly before taking the next major step.
Step 5: Update DNS Records for Seamless Transition
This is where the actual zero-downtime magic happens. Log into your domain registrar account and update your nameservers or A-records to point directly to your new GoDaddy hosting IP address.
Because both your old host and your new GoDaddy hosting servers contain identical copies of your website, visitors will seamlessly land on either the old or new server while the DNS records propagate globally over the next 24 to 48 hours. Once propagation is complete, you can safely terminate your old hosting contract.
Conclusion: Let the Experts Handle Your Digital Growth
While migrating your website to GoDaddy hosting is highly rewarding, handling data transfers, server configurations, and database linkages manually can be incredibly time-consuming and technically risky.
If you want to ensure a guaranteed, risk-free transition, partnering with an expert IT solutions provider makes all the difference. At Amyntas Media Services, we specialize in professional web management, cloud deployments, and seamless corporate migrations. Let our technical experts handle your server transitions efficiently while you focus entirely on scaling your core business operations.
#GoDaddyWebHosting #WebHostingMigration #ZeroDowntimeMigration #GoDaddyReseller #WebsiteMigrationService #cPanelHostingMigration #MoveWebsiteToGoDaddy #HowToMigrateWebsite #GoDaddyHostingPlans #BestHostingForSmallBusiness #ITSolutionsGurgaon #GoDaddyHostingPrice #WebHostingProvider #MigrateWordPressToGoDaddy #ManagedITServices #CloudManagedServices #WebDevelopmentCompany #DigitalTransformation #SMECloudSolutions #ServerMigrationGuide #GoDaddyCPanelIntegration #SecureWebHosting #WebsiteManagementServices #ITConsultingGurgaon #CloudManagedServices #WebsiteDesignAndDevelopment #CloudMigrationServices #SpeedUpWebsite #DatabaseMigration #TechSupportGurgaon #AmyntasMediaWorks
FAQ
Q1: How do I migrate my website to GoDaddy hosting with zero downtime?
A: To migrate to GoDaddy hosting with zero downtime, keep your old hosting account active while uploading an identical copy of your website files and databases to your new GoDaddy server. Test the configuration using a preview URL or by editing your local hosts file. Finally, update your domain’s DNS records; because both servers host identical content during the 48-hour DNS propagation period, your visitors experience absolutely no service interruption.
Q2: What is the easiest way to handle GoDaddy website migration for a small business?
A: The easiest way to handle GoDaddy website migration without risking data loss or broken links is to hire a certified IT solutions agency. Utilizing professional managed services eliminates technical guesswork, ensuring that server configurations, database mapping, and email migrations are executed correctly from day one.
Q3: Why should I choose Amyntas Media Works in Gurgaon for my web hosting setup?
A: You should choose Amyntas Media Works in Gurgaon because they are an experienced IT technology and cloud services provider with a proven track record in end-to-end digital management. Based in Sector-31, Gurugram, their expert team delivers localized 24/7 technical support, tailored web hosting plans, and seamless server migrations optimized specifically for growing SMEs.
Q4: How long does it take for a web hosting migration to GoDaddy to complete?
A: The physical file transfer and database setup on a GoDaddy server typically takes a few hours depending on the size of your website. However, the complete migration process requires an additional 24 to 48 hours for global DNS propagation to finalize across internet service providers worldwide.
Q5: Does Amyntas Media Works offer support for GoDaddy reseller packages in Gurgaon?
A: Yes, Amyntas Media Works is a trusted GoDaddy reseller and IT consulting provider in Gurgaon. They provide comprehensive backend setup, cPanel integration, custom website design, and dedicated managed IT services to help businesses deploy robust online platforms effortlessly.
 Cheap Business Email for Startups in Delhi NCR
 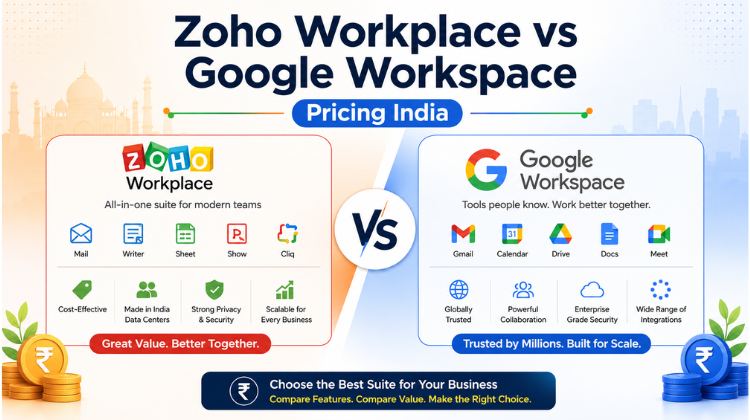 Zoho Workplace vs Google Workspace Pricing India
  A Complete Overview of Zoho’s AI Assistant Zia
  Maximizing Hybrid Work: Driving Employee Adoption of Zoho Cliq and WorkDrive
  Zero Downtime: What to Expect When Migrating Your Enterprise Email to Zoho Workplace